
In this blog we will talk about one of the foundational skills: the basic pole climb. It’s a move you will learn in your early pole dance journey. For some it comes easy, but for others it remains a struggle for a while. As an instructor it is key to know how this technique can be broken down and what tips you can give your students. So buckle up as we dive into our 4 easy steps to a perfect pole climb!
General notice: because we receive more and more interest from non-Dutch speaking people, we decided to switch to English for our blogs and video’s. This makes sharing knowledge even easier, which is always our goal <3
Getting a nice, smooth, easy-looking pole climb only takes 4 steps. Watch the video for the complete breakdown of the 4-step technique of the basic pole climb, or scroll down if you prefer reading.
Perfect pole climb step by step
First things first; the basic pole climb is more a technical move, than one that requires a lot of strength. Of course you still need some muscle power, we can’t make gravity disappear 😉 However, with the right technique you can minimise the amount of strength needed.
As a pole instructor you need to be able to break moves up into smaller pieces. This way you can create a success experience for your students. Even ‘basic’ moves like a pole climb can be divided into smaller parts, which is what we will be doing next.
We have divided the basic pole climb into 4 steps.
Perfect pole climb: step 1
Step one is your grip, which you create with your legs. Place one shin diagonally on the pole, with the inside of your knee resting against the pole. Your foot is resting on the other side of the pole, don’t worry about your foot being flexed at this point.
Grab the pole high with both hands. When you start with your right shin on the pole, your right hand will be your upper hand and vice versa. Remember to train both sides equally!
From here, bring your other leg around the pole and place your calve on the pole. Also diagonally, but in the opposite direction. This way the pole ends up between both of your knees.
People mostly focus on the grip coming from squeezing your knees together, however the grip also comes from bringing your shin and calve towards the pole.
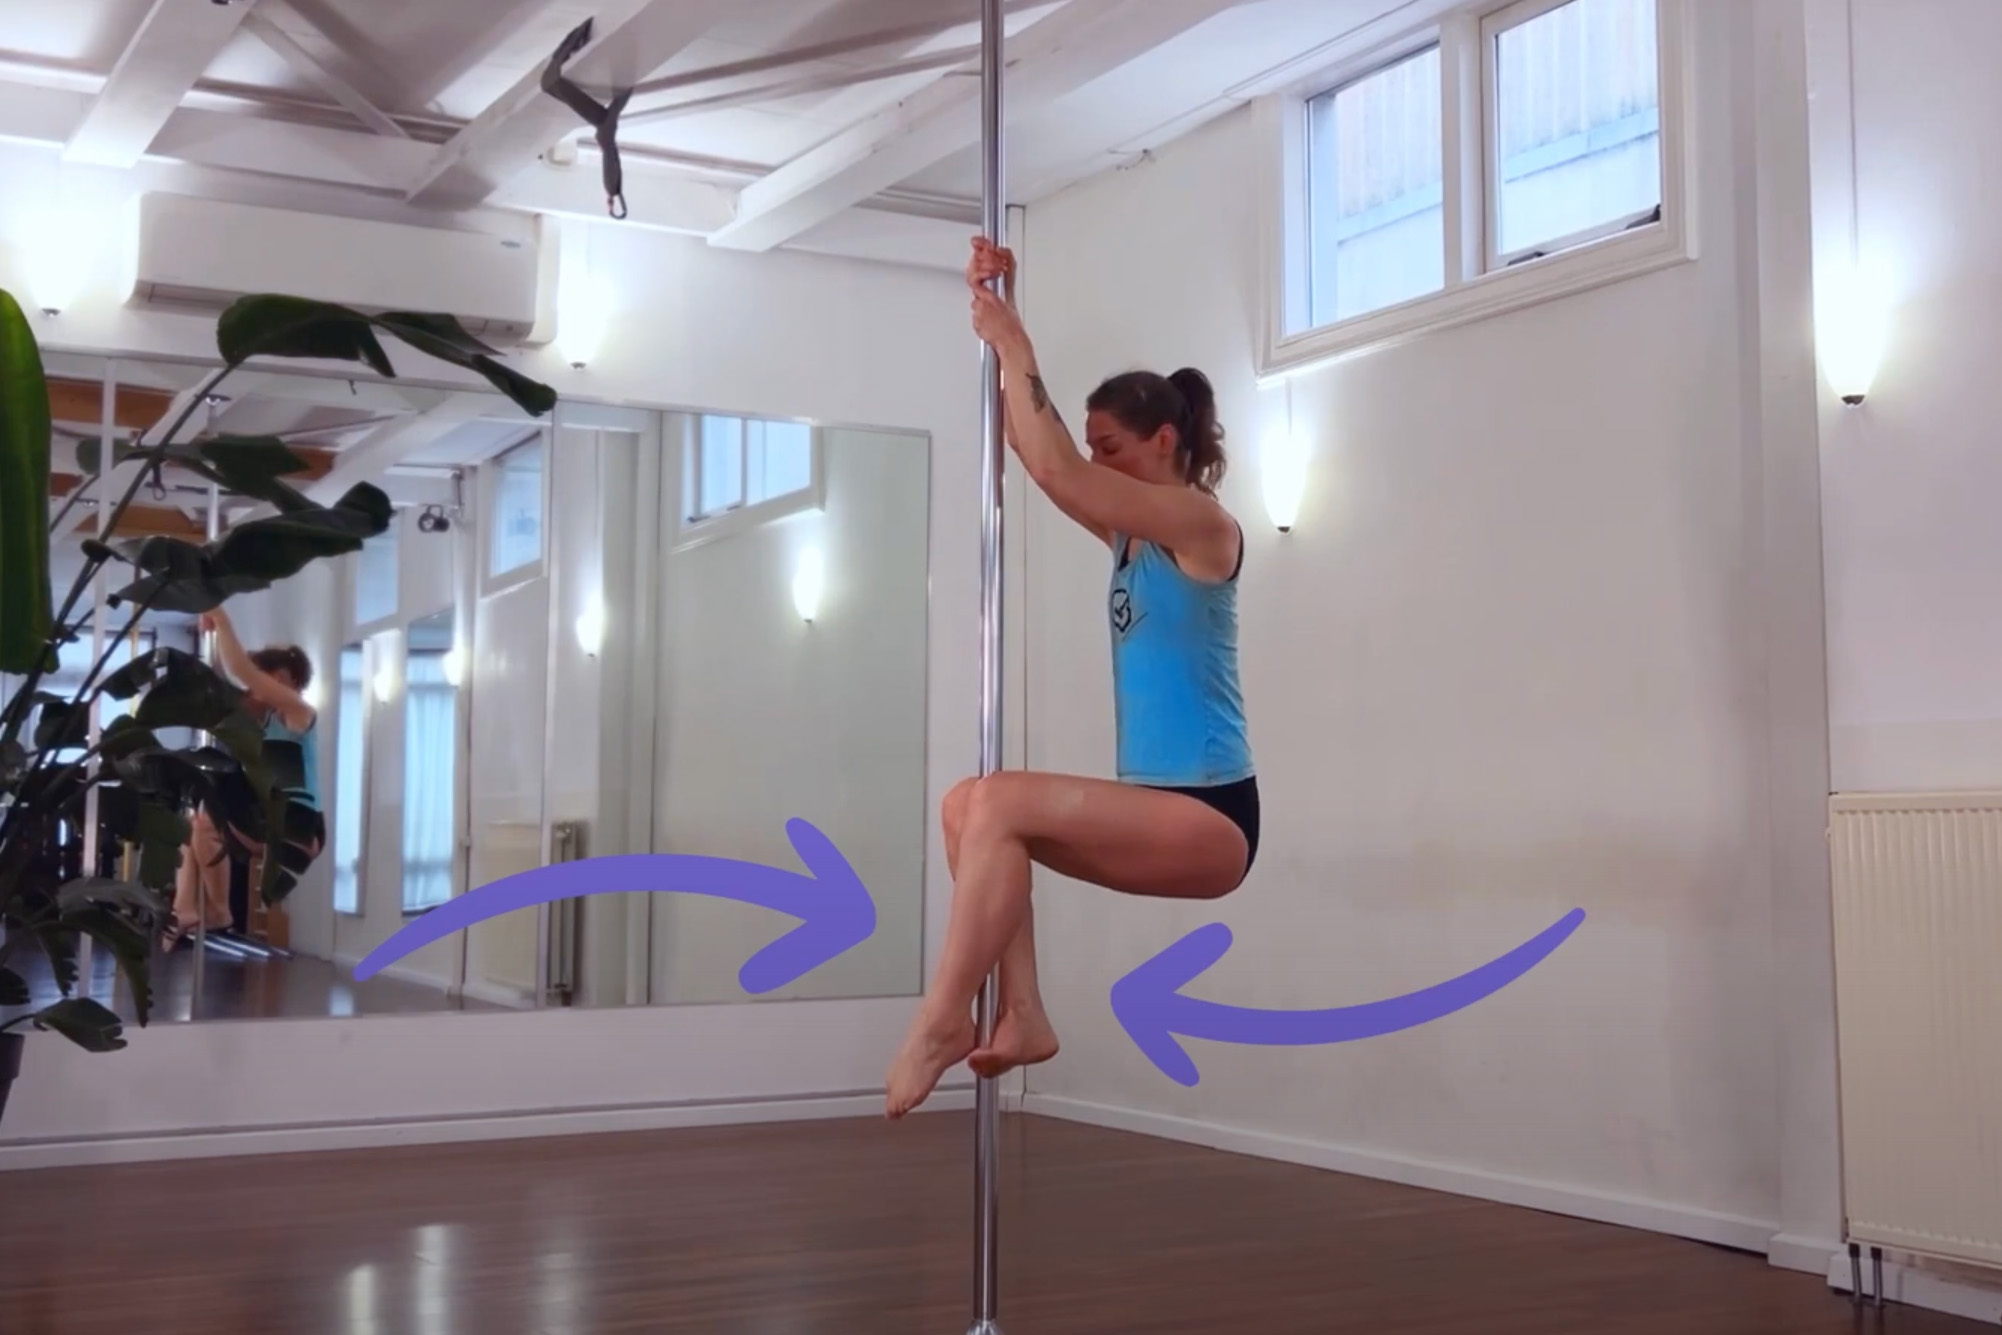
The first thing you want to achieve is to be able to hold this position. This means you will have to push the knees together AND push into the pole with your shin.
Check our YouTube video for more tips and conditioning exercises!
Perfect pole climb: step 2
Step 2 is standing up by straightening your legs. Your climbing power is mostly coming from your leg muscles! You will notice that if you start thinking about climbing as a leg based move, it will be less heavy. Pulling yourself up from the arms is waaay harder.
Hold the grip between the shin & calve and push from the legs, like a (pole) squat. Bring your hips towards the pole as much as you can.
Perfect pole climb: step 3
Onto step number 3: repositioning the hands. After standing up and bringing the hips close to the pole, you slide your hands up high. Keep both hands close together.
For your basic climb, you want to start with both hands on the pole, instead of having your forearm on the pole. A forearm climb is a really nice variations, but for now, let’s focus on the technique first.
Perfect pole climb: step 4
The final step is to lift up your knees and bring your legs back into our starting position. Because you are hanging from your (almost) straight arms, this will require the least amount of strength.
Think about how you practiced pushing off of the pole with your shin, because this will come in handy now. If we JUST lift up our knees, we won’t be able to create a nice grip to continue climbing. We have to actively push with the leg closest to us, so we can bring our knees into the desired position and start squeezing again with the knees.
Combining all the steps
To recap, these are all the steps we discussed:
- step 1: positioning your hands and legs
- step 2: standing up
- step 3: reposition your hands
- step 4: reposition the legs
Now you want to work on flowing thought the different steps and make it one smooth movement going up the pole. This will take some time and practice, but that’s totally ok, because we love pole!
Tips, tricks & variations
When your students feel totally comfortable with the basic pole climb, you can really start to play around with all the different options there are out there. Think about the forearm climb, climbing down the pole, playing with different leg positions between climbs, static rotation etc.
See our YouTube video for more inspiration and tips about execution!
And a gentle reminder to have your students practice both sides equally. If they do this from the very start, it will not be a problem whatsoever. But it WILL make the rest of their pole dance journey easier.
Happy teaching – and if you want to learn more about instructing beginner pole dancers, feel free to check out our Pole Instructor Foundations course!
Comments are closed.